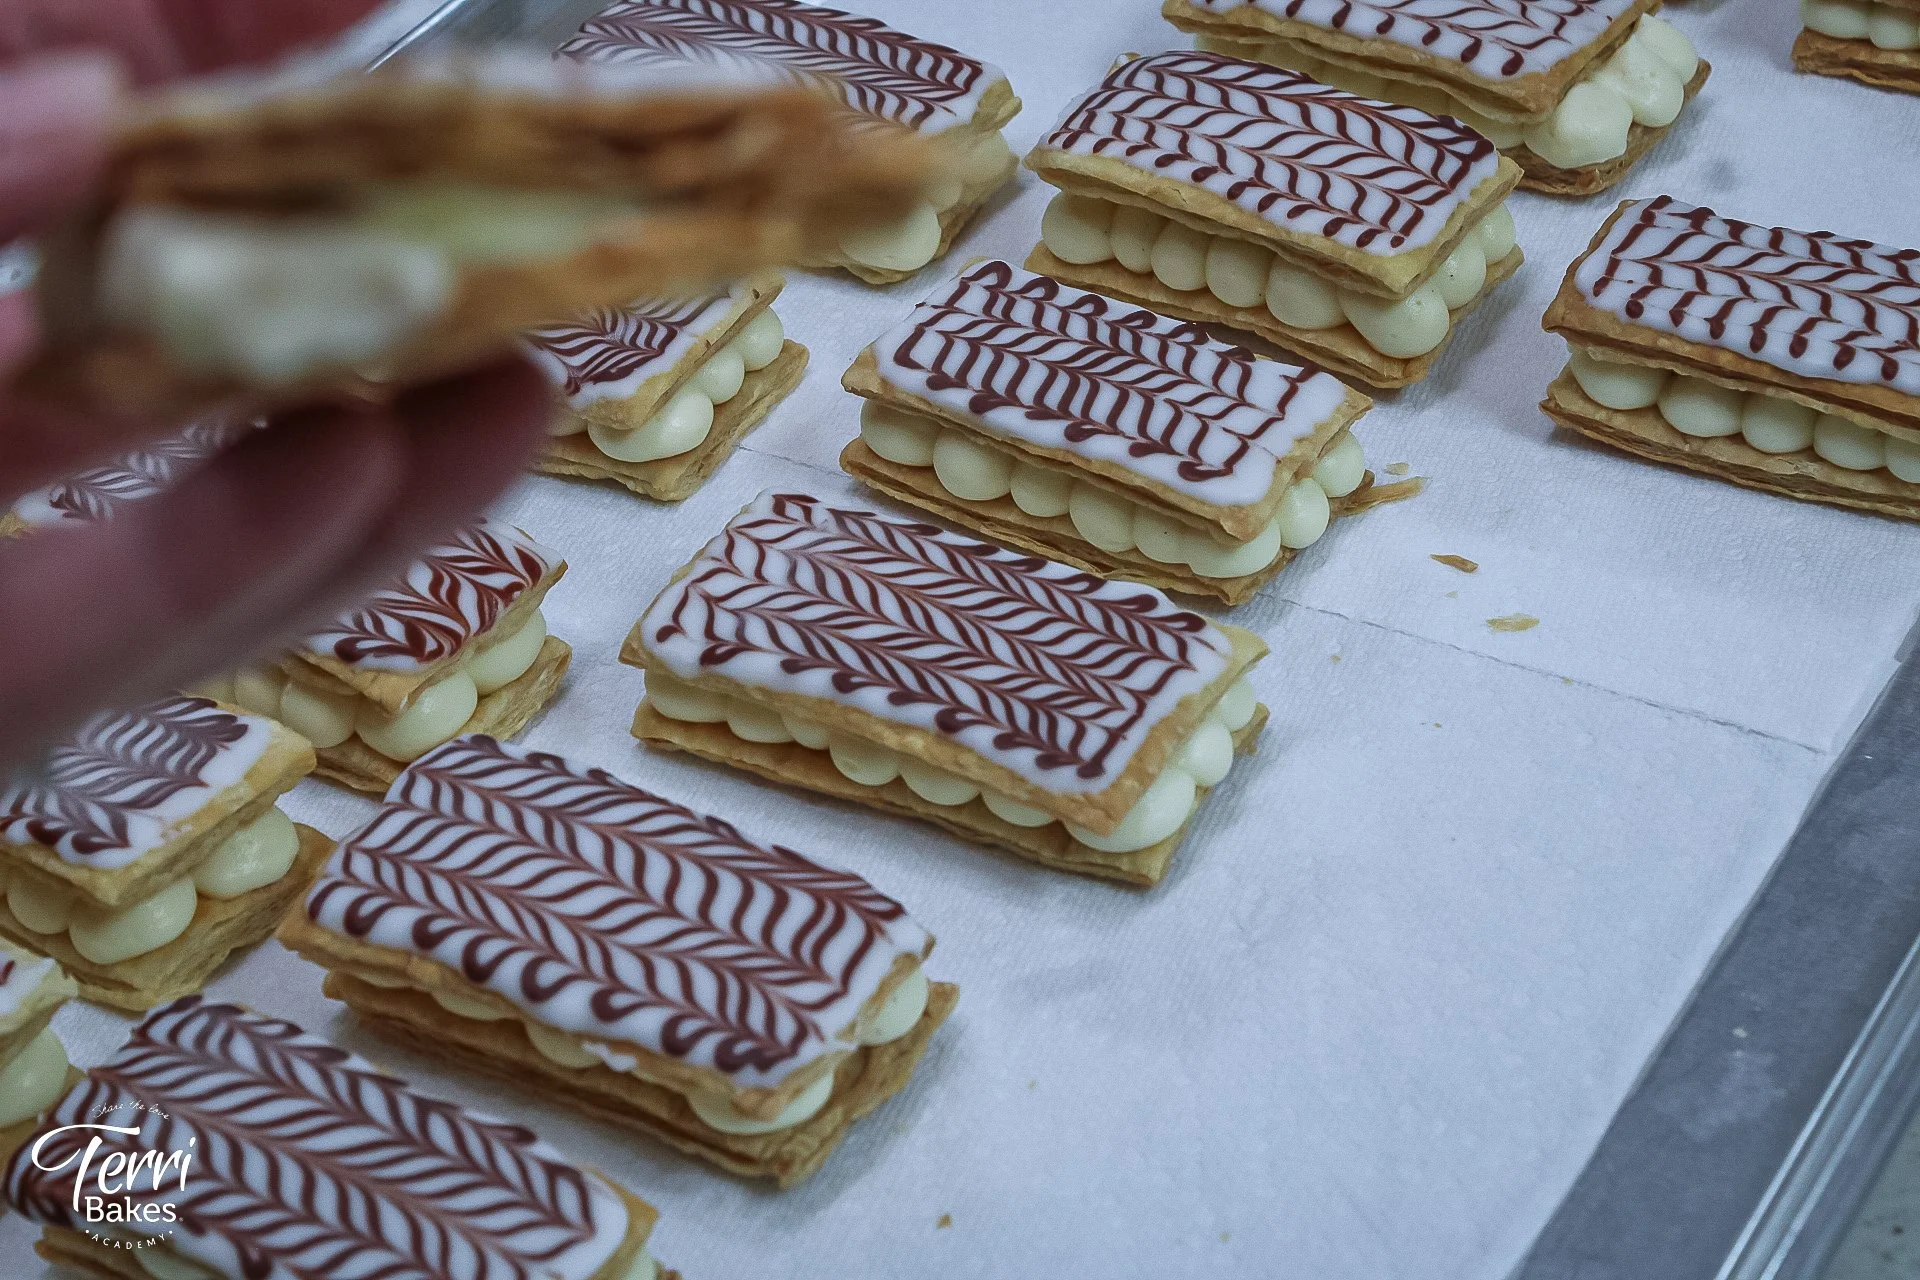
Napoleon aka Mille-Feuille
Napoleons
What Is Napoleon (Mille-Feuille)?
Napoleon, also known as Mille-Feuille (French for “a thousand layers”), is a classic French pastry celebrated for its delicate texture, rich flavors, and impressive presentation. This dessert features thin layers of flaky puff pastry alternating with luscious fillings, typically pastry cream, and is topped with either powdered sugar, fondant glaze, or a feathered icing pattern for a polished look.
The Components of a Mille-Feuille
Puff Pastry: The base of a Napoleon is made from puff pastry, known for its buttery layers that puff up beautifully when baked. Achieving this texture requires a meticulous folding and rolling process that creates hundreds of crisp, airy layers.
Pastry Cream: Traditionally, Mille-Feuille is filled with silky pastry cream, flavored with vanilla. Variations might include whipped cream, custard, or even flavored fillings like chocolate or fruit purée.
Topping: The classic version features a glossy fondant glaze with a chocolate feathered design. Some are dusted with powdered sugar or garnished with fresh fruits for a more rustic appeal.
A Timeless Classic with Many Faces
While the Napoleon originated in France, it has become a global pastry favorite, with regional adaptations adding unique twists. For example:
In Italy, it’s known as Millefoglie and often features layers of whipped cream or mascarpone.
In Russia, the Napoleon Cake includes many layers of puff pastry and a slightly softer cream, making it more like a cake than the French pastry.
In the Middle East, phyllo dough sometimes replaces puff pastry, and fillings might incorporate rose water or pistachio cream.
A Culinary Challenge Worth Tackling
Creating a Mille-Feuille is a true test of pastry skills, requiring precision in both the preparation of the puff pastry and the assembly. For home bakers, pre-made puff pastry can simplify the process without sacrificing too much of the magic.
Whether served at a fancy patisserie or homemade for a special occasion, the Napoleon is a dessert that combines artistry and flavor. Its crisp, creamy layers make every bite a delightful experience worth savoring.
Pastry Cream Ready to Chill
Here’s how to make them:
Napoleon - Mille-Feuille
Ingredients for all components:
No-Fuss Pastry Cream Filling
Ingredients
1/2 cup sugar
1/4 cup cornstarch
Pinch of kosher salt
4 large egg yolks
1 ½ teaspoon pure vanilla extract or vanilla bean paste
2 cups whole milk
2 tablespoons unsalted butter
Whipped Cream
1 cup cold heavy cream
Puff Pastry Layers
1 (1-lb.) package puff pastry
All-purpose flour, for dusting
Vanilla – Chocolate Icing
1/2 tsp. pure vanilla extract
2 1/4 c. (270 g.) confectioners’ sugar, divided
4 Tbsp. whole milk, divided
1 Tbsp. unsweetened cocoa powder
Equipment for Icing Piping: 2 piping bags, a 1/4" round tip, and a 1/2" round tip
Directions for Pastry Cream and Whipped Cream
Step 1
Whisk together sugar, cornstarch, and salt in a medium saucepan. In a glass measuring cup, whisk together egg yolks and vanilla extract/bean paste; whisk in milk. Add to saucepan along with butter and bring to a gentle boil over medium heat. Let boil for 1 minute, still whisking, then remove from heat and stir in vanilla.
Step 2
Strain the pastry cream through a fine-mesh sieve into a bowl. Pour the hot pastry cream onto a plastic wrap-lined rimmed baking sheet and cover with plastic wrap, pressing directly onto the cream. (This will prevent a skin from forming.) Refrigerate until it’s cold for at least 1 hour.
** Bake puff pastry layers while waiting for the pastry cream to cool. **
Step 3
When the pastry cream is cool, whisk heavy cream in a large bowl until stiff peaks form. Transfer the cold pastry cream to another large bowl and stir until smooth. Stir one-quarter of the whipped cream into the pastry cream until combined. Using a rubber spatula, carefully fold in the remaining whipped cream. Refrigerate the pastry cream filling until ready to assemble.
To Bake the Puff Pastry Layers
Step 1
Place a rack in the center of the oven and preheat to 400°. Line 3 baking sheets with parchment. Remove 1 sheet of puff pastry from the refrigerator. On a lightly floured surface, roll out to a 12" x 12" square. Using a sharp knife or a pizza wheel, cut the square into 3 (12" x 4") rectangles, then cut each rectangle into 6 (4" x 2") smaller rectangles.
Step 2
Transfer rectangles to prepared baking sheets, spacing about 1/2" apart. Repeat with the remaining sheet of puff pastry.
Step 3
Top one tray of pastry rectangles with another sheet of parchment and a second empty baking sheet (this will prevent the pastry from puffing too much).
Step 4
Bake the pastry until browned and crisp, 15 to 20 minutes. Remove the top baking sheet and parchment. Transfer the rectangles to a wire rack and let them cool completely. Repeat with the remaining trays of pastry.
Store in an airtight container at room temperature.
Now let’s put it all together:
Time to Assemble:
Step 1
Whisk vanilla, 1 1/4 cup confectioner’s sugar, and 2 Tbsp. milk in a small bowl until smooth. Cover the bowl with a damp paper towel until ready to use.
Step 2
Whisk cocoa powder, the remaining 1 cup of confectioner’s sugar, and 1 Tbsp in another small bowl, plus 2 tsp. milk until smooth. Add more milk if needed until the mixture is stiff, pipeable glaze consistency. Transfer to a piping bag fitted with a 1/4" round tip.
Step 3
Arrange 12 pastry rectangles on a wire rack set over a baking sheet. Using a small offset spatula or butter knife, spread white icing over the entire top of each rectangle.
Step 4
Carefully pipe 6 lines of chocolate icing crosswise over white icing, spacing each about 1/2" apart. Drag the pointy end of a clean toothpick through the center of the icing from one short end to the other (at a perpendicular angle to the chocolate icing lines). Repeat on either side of the first line, dragging the toothpick in the opposite direction to create a chevron shape. Repeat with the remaining 11 rectangles.
Step 5
Transfer the pastry cream filling to another piping bag fitted with a 1/2" round tip. Arrange 24 un-iced rectangles in pairs on a clean work surface (if rectangles are slightly uneven, try to pair up rectangles with similar size/shape). With the piping bag tip pointed straight down, pipe 2 rows of 5 dots (about 1/2 tsp. each) on each rectangle.
Step 6
Carefully stack paired rectangles on each other so both cream fillings face up. Top with an iced rectangle.
Step 7
Serve immediately or refrigerate until ready to serve.


